Light & Shadow
Light source
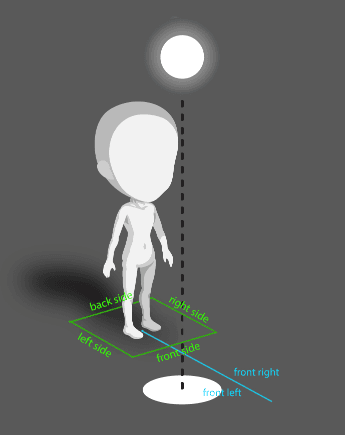
In Highrise, the light source on an object is from the front, top left. It can be difficult to label the direction in the isometric virtual world, so note the descriptions on the floor in this image:
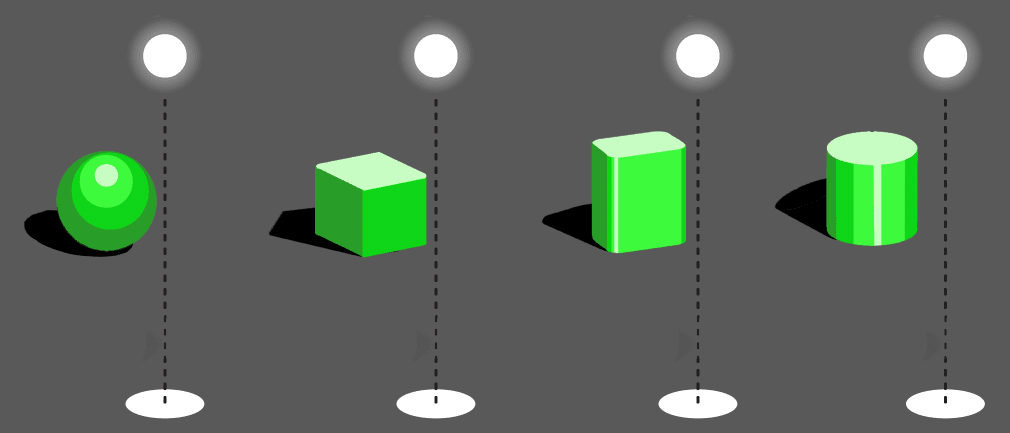
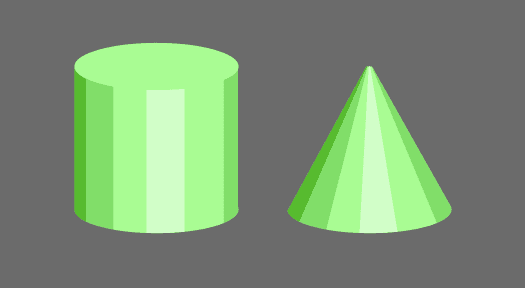
Here’s the lighting hitting different basic shapes:
The shading on the avatar body is similar to the shading pattern on clothing, and can be a useful guide for how to shade.
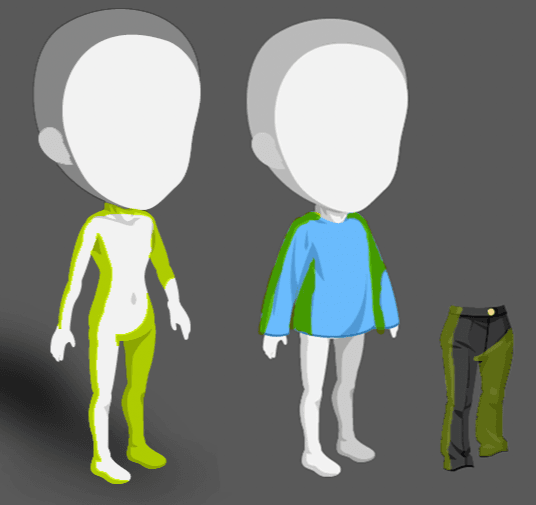
Sometimes, we shift the light source to the right, more directly in front, or left to give the item more clear form or depth. However, the shading for shirts, pants, etc. usually follows a similar pattern.
Shading Pattern - Shirts
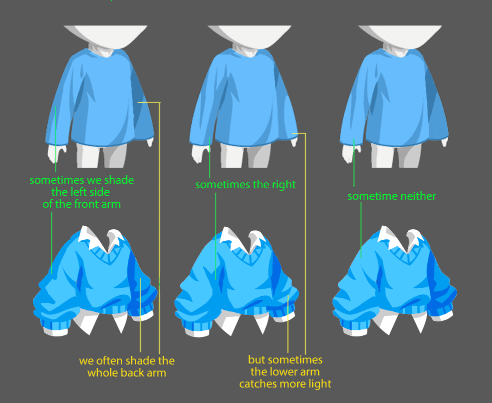
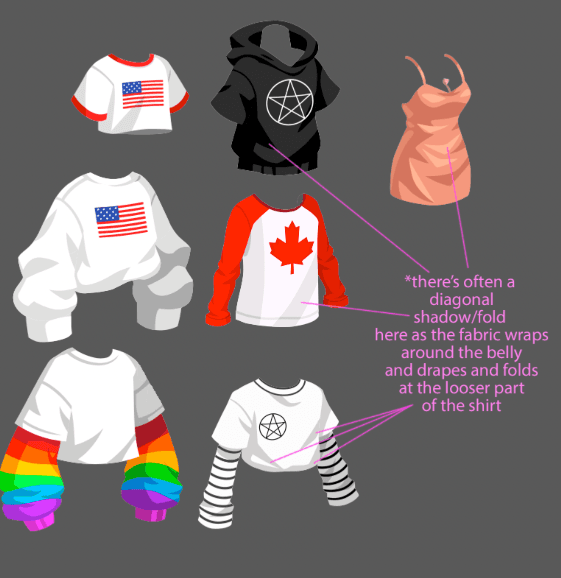
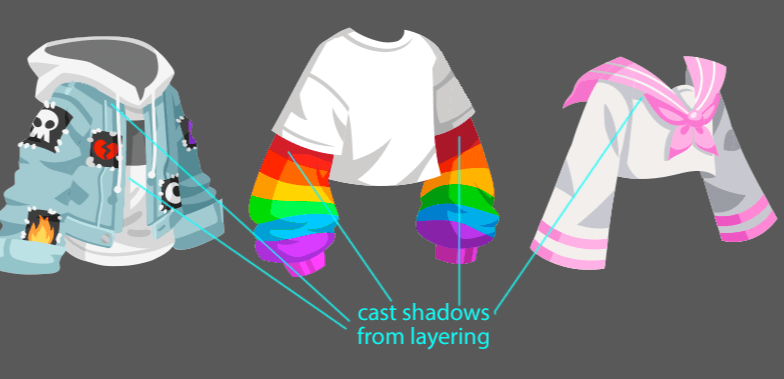
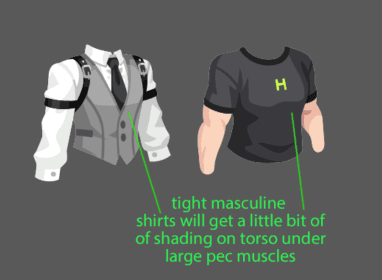
Notice how the shading pattern of the body is applied to these shirts:

Common variances of this shading pattern:
More common shading patterns:
Shading Pattern - Pants/Shorts
Again, you’ll see the shading pattern on the pants is similar to the body:
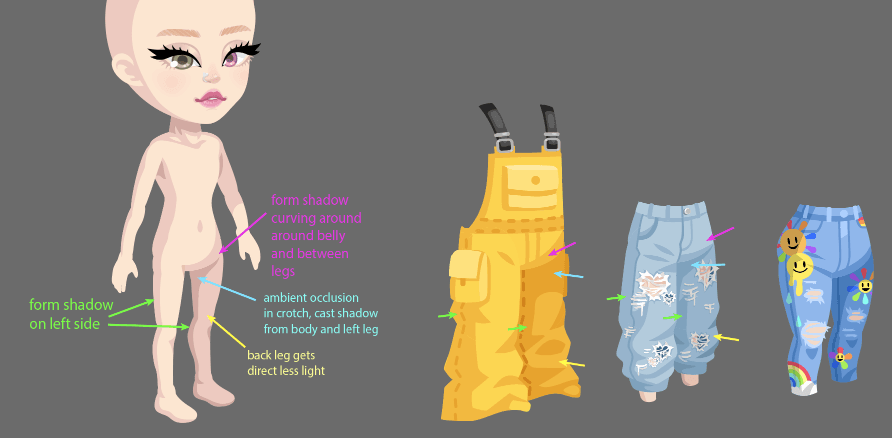
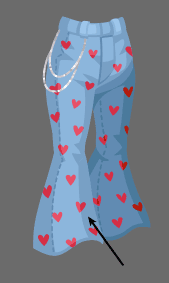
Sometimes we will shade the right side of the left leg as well:

Sometimes we will not shade the side of the left leg at all, but this is kind of rare, and often makes the pants look a bit flat.
Shorts follow the same shading pattern. They are just… shorter.

Here’s some other common shading patterns/folds that you will find on pants

For more info on folds and draping in clothes, check out the section on Materials & Rendering.
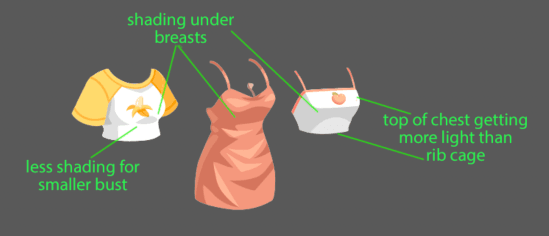
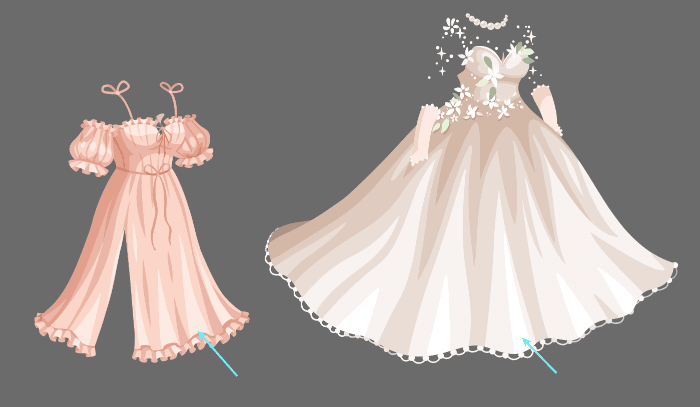
Shading Pattern - Skirts/Dresses
Skirts and dress are pretty simple. You can think of them as a cylinder or a cone.
Similar to shirts, dresses will pretty much all have a strong core shadow on the left side of the body, to turn the form and cast by the left arm.
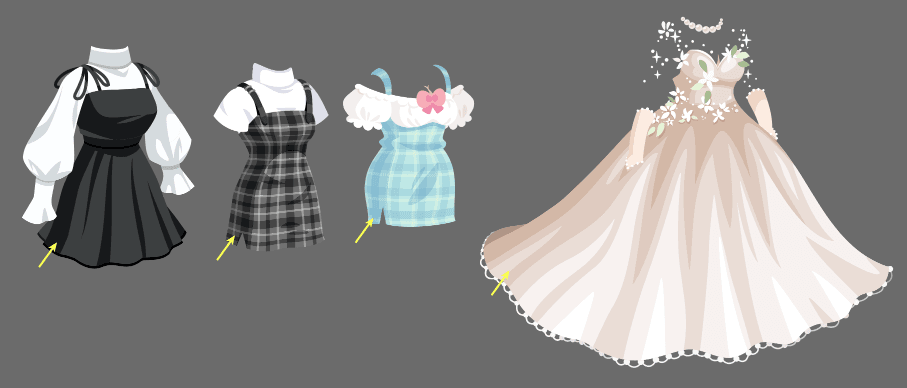
They may or may not have a shadow on the right side as well to help turn the form.
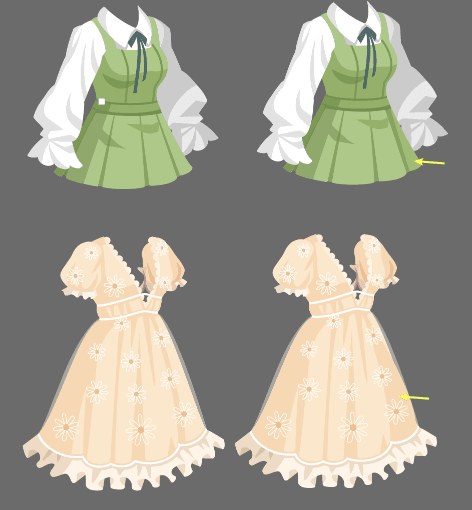
Ruffles will often get a little light on the bottom, especially shiny material:
Shading Pattern - Hats/hair
Thinking of the top of the head like a sphere can help understand the way the light hits the head.
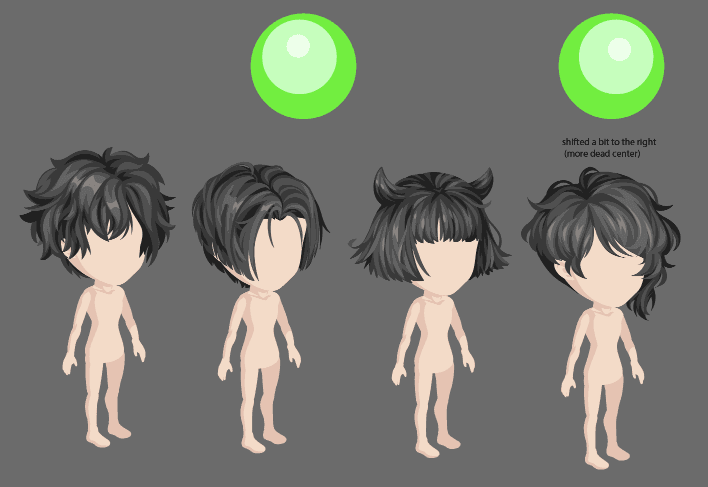
The hair is one item type where we might shift the light to the right a bit. But, be careful, as this can flatten the hair and lose the primary form.
The hair above the forehead and the left temple (the bangs) will usually be the lightest area and get the most highlight. Hair in the bottom back left will usually be more in shadow. The right side, back hair will be the darkest area.
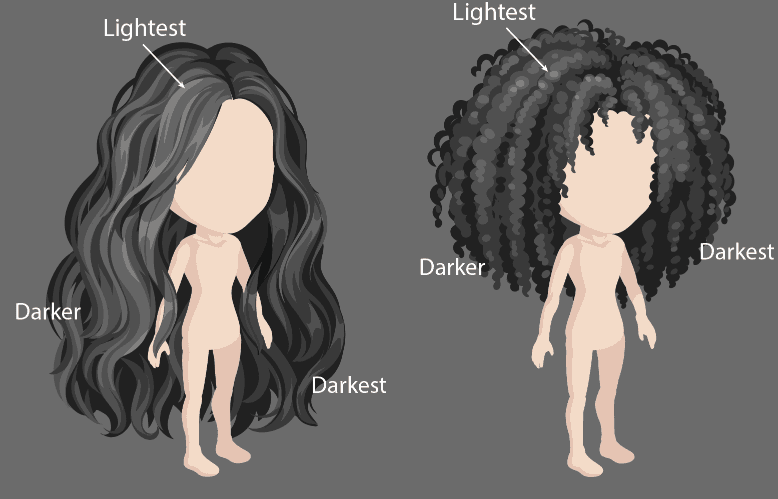
It’s often good to plan your primary forms using a few tones and this basic shading pattern.
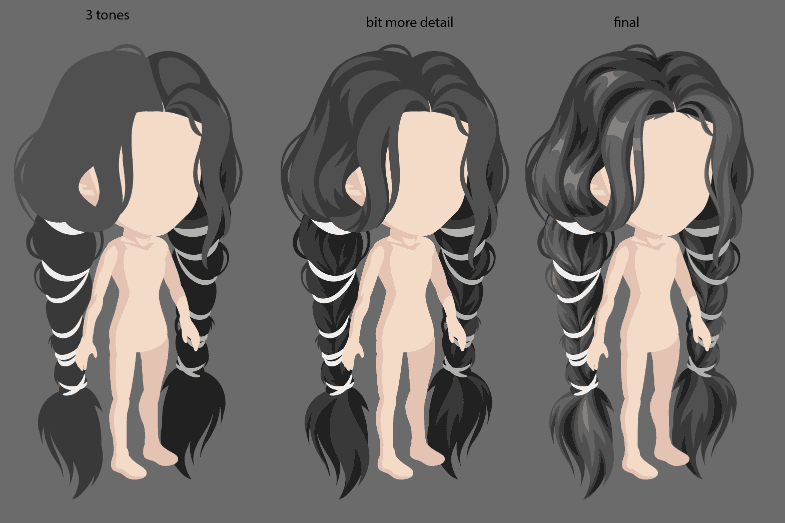
For more info on hair visit our guide on Hair & Hair Texture.
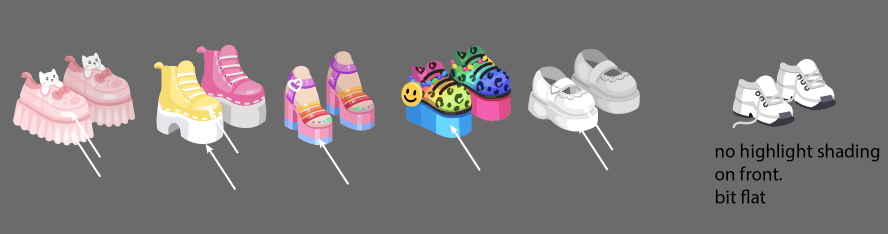
Shading Pattern - Shoes
The lighting also sometimes varies on shoes. If the shoe is a box, the light hits the front left corner; it can be hard to know where to put the light! Sometimes the top might be more lit than the front or side... and sometimes not.
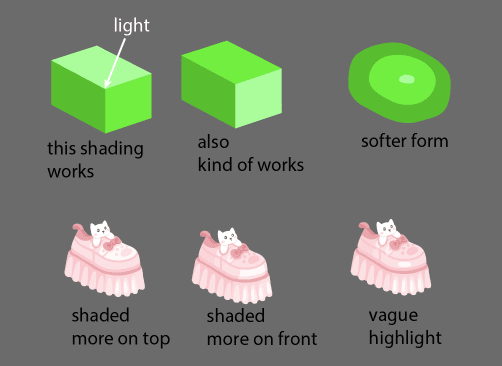
Despite these variations, there will pretty much always be a highlight somewhere on the toe/front of the shoe.
Shading Pattern - Face
The avatar face is a 3/4 face with the light hitting the left temple.
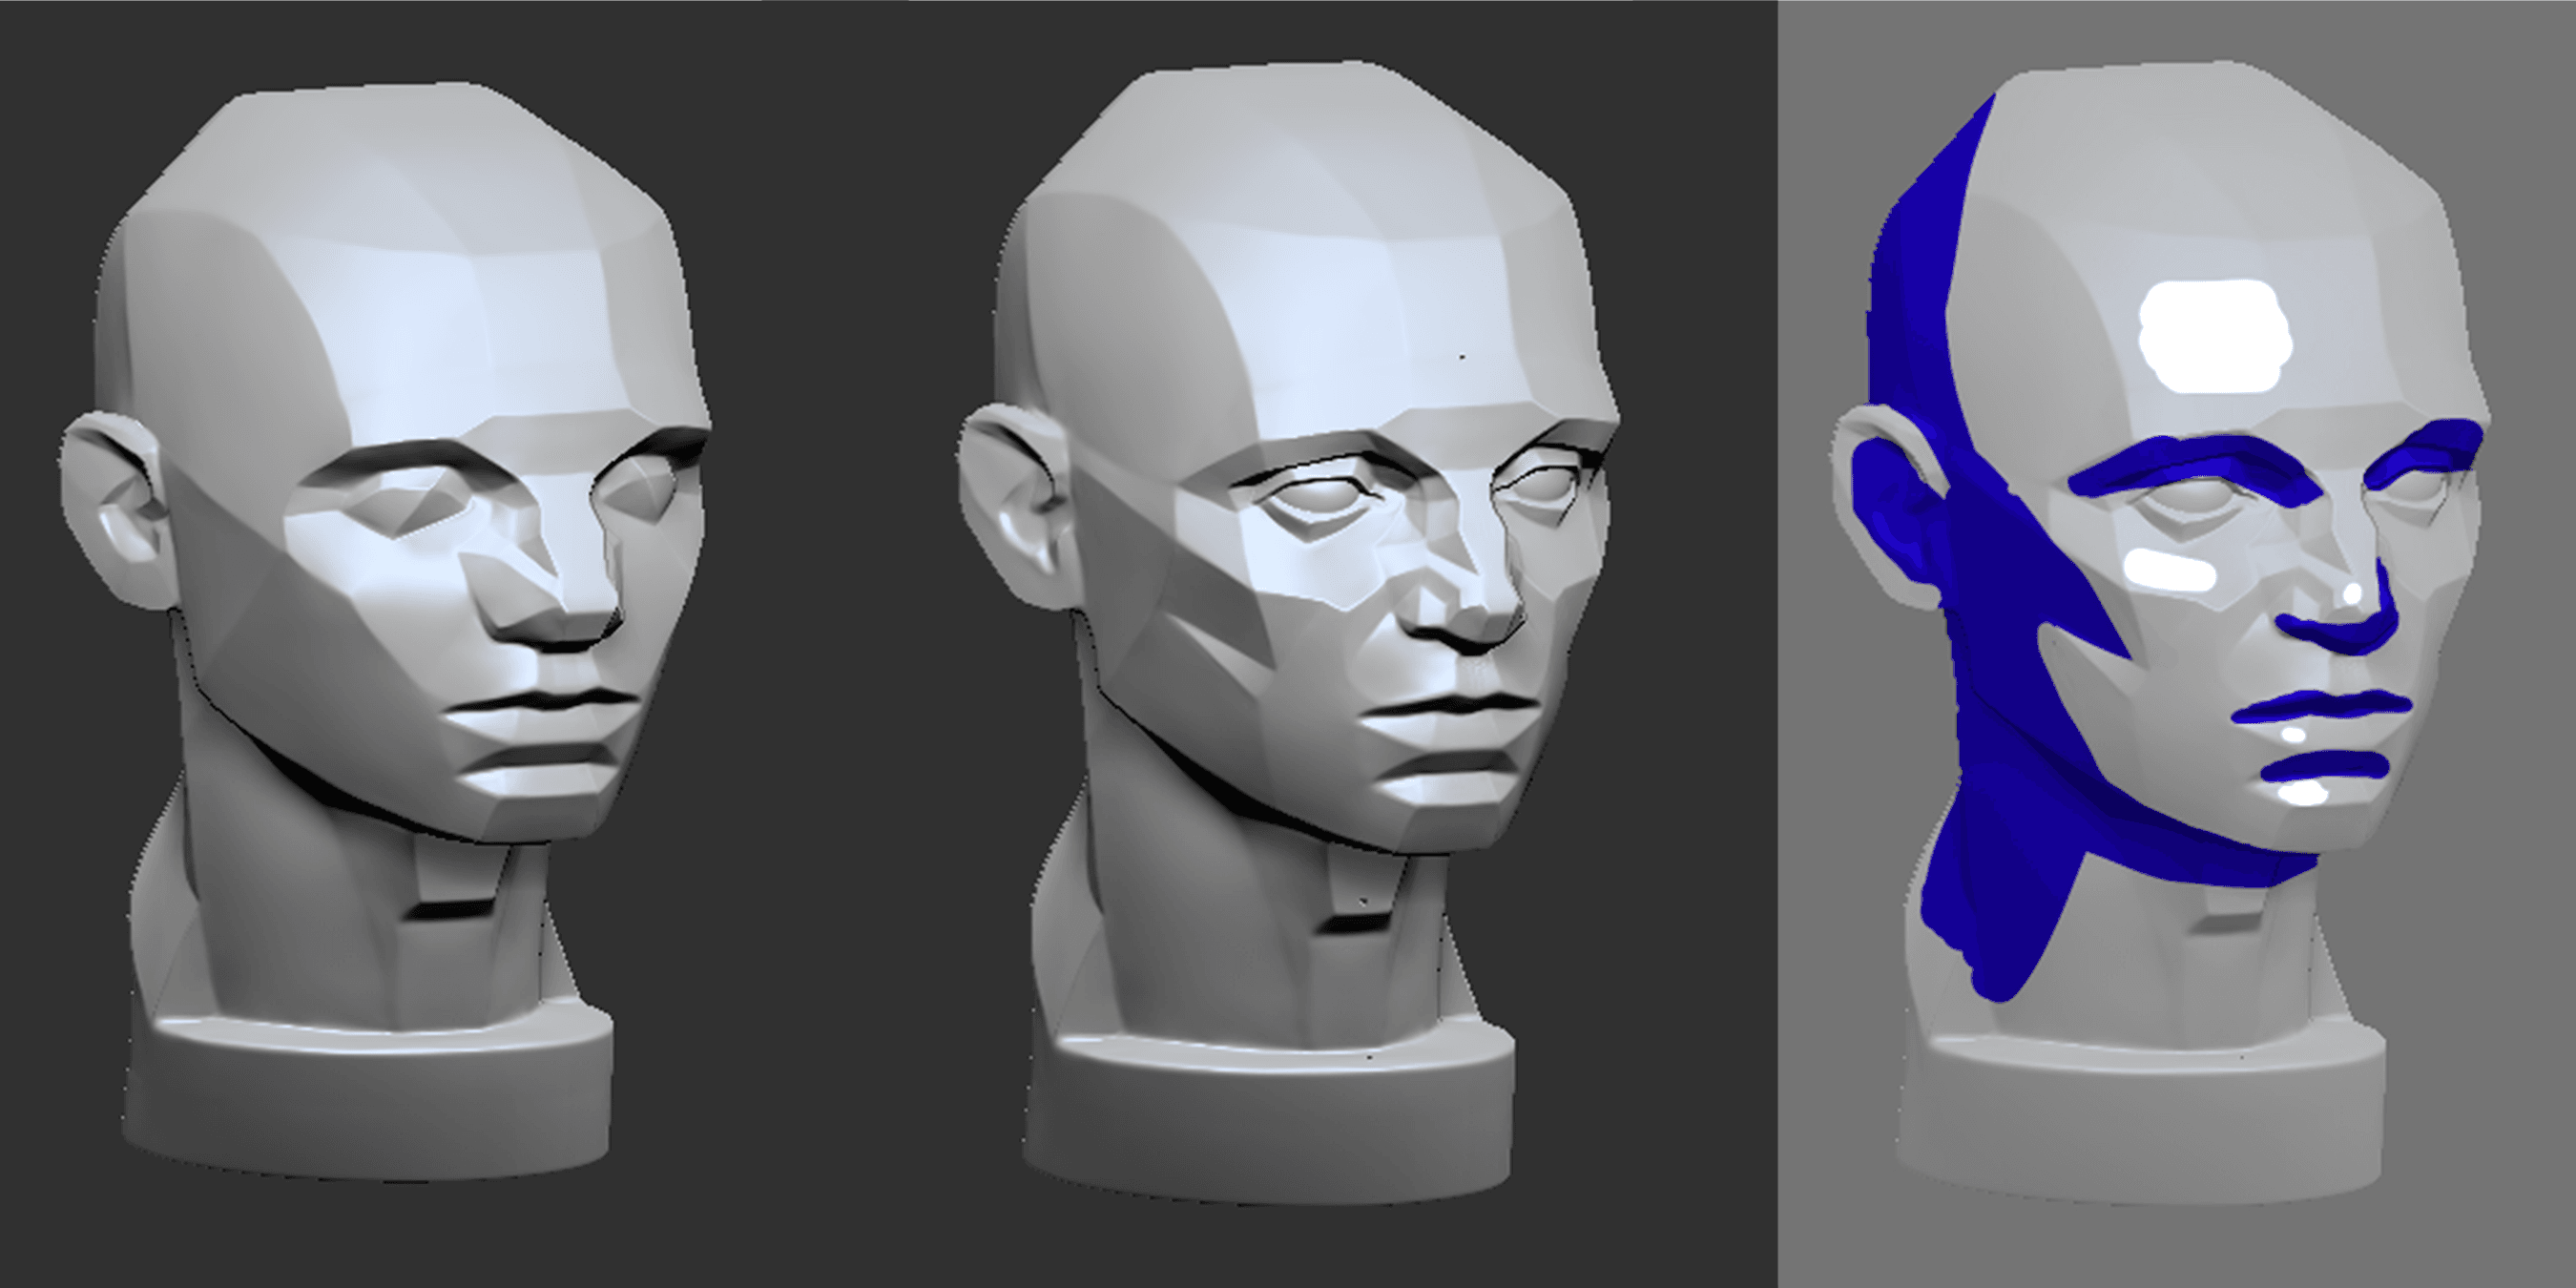
This is showing the basic shading pattern: shading on the left side of the head as the form turns, shading under the brow, shading under the nose, on the upper lip and under the bottom lip. Highlight is on the left temple, left cheekbone, tip of the nose, left side of the bottom lip and on the chin.
Applying to Our Avatars
Here is that basic shading pattern on the avatar. Different items will have slightly different shading and highlight, depending on the design and the style. Our base head does not have much shadow and highlight around the temples and cheeks, so this one is shown with a face contour make-up item to bring out the dimension.

Our faces often don’t have super strong directional light. This is partly because we want them to mix and match with other items and shadows can sometimes conflict with versatility. For example, we don’t usually have strong light under the brow, because we can’t be sure what eyes and brows someone will equip. Other than that, it is basically the same pattern to the maquette head.

