Lecture 10: Lighting Basics
Introduction
Lighting is key to making your game look great and feel real. It helps set the mood, highlight key parts of your game, and guide players. In this lecture, we'll go over the basics of using lighting in Highrise Studio to improve your game's visuals.
Key Concepts
Here are the main lighting concepts we'll cover, each linked to a specific part of the lecture for more detailed learning:
- Environment Lighting - Controls the general lighting of your scene.
- Light Sources - Adds lights to your game world.
- Shadows - Gives depth to your scene with realistic shadows.
- Bake Lighting - Saves computer resources by optimizing lights.
- Post-Processing Effects - Enhances your scene with special visual effects.
Getting Started
Before we start, make sure you're familiar with the topics from previous lectures to fully benefit from this session.
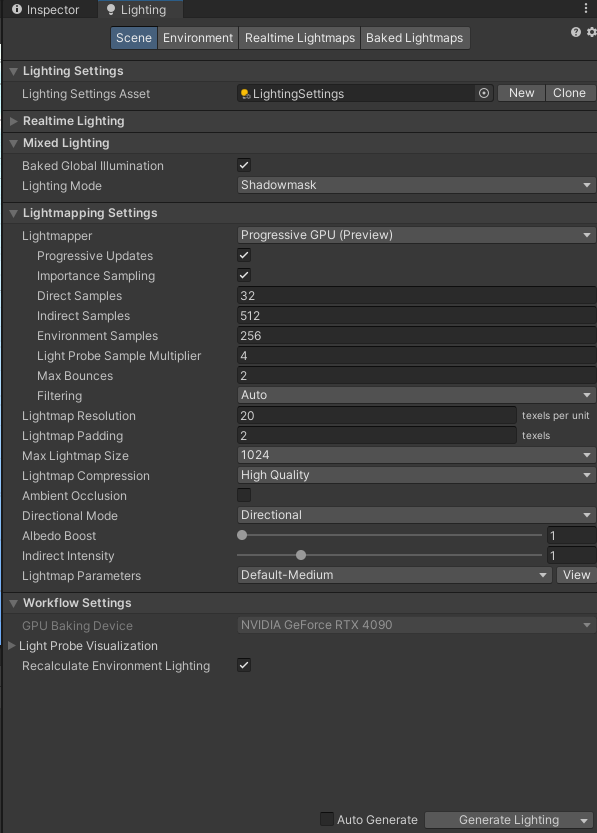
Accessing the Lighting Window
Here’s how to get to the lighting settings in Highrise Studio:
- Navigate to
Window>Rendering>Lightingor simply pressCtrl + 9. - The Lighting window will appear where you can tweak various settings.
- You can move this window next to the Inspector for easy access.
Supported Light Modes
Highrise Studio currently supports only Baked lighting, meaning all lights need to be pre-calculated and saved (baked) into your scene before playing. Real-time lighting isn’t available in this version.
Don’t worry if this sounds complex! We'll explain more about how to effectively use baked lighting in the following sections.
YouTube Tutorial
What You’ll Achieve
By the end of this lecture, you’ll understand the basics of lighting in Highrise Studio. You'll learn how to use different lighting tools to create the perfect atmosphere and look for your game.

