Lecture 6: Navigation Mesh (NavMesh)
Introduction
In this lecture, we'll explore how to set up a Navigation Mesh (NavMesh) in Highrise Studio. A NavMesh helps characters navigate through game environments by outlining walkable areas and avoiding obstacles.
What is a Navigation Mesh?
A NavMesh is a special component applied to game environments in Highrise Studio, marking areas where characters can walk and identifying obstacles they should avoid.
Creating and Viewing a NavMesh
Enabling NavMesh AI Navigation
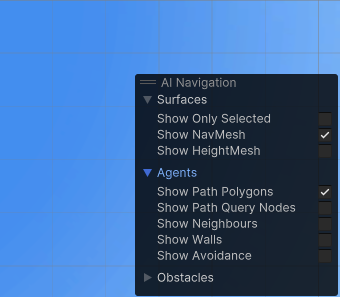
To start working with NavMesh components:
- Access the Scene View Toolbar and locate the NavMesh AI Navigation.
- Enable NavMesh AI Navigation: Use the
~key to toggle visibility if not visible. - Visualize the NavMesh: Make sure "Show NavMesh" is active and Gizmos are turned on.
Key NavMesh Components
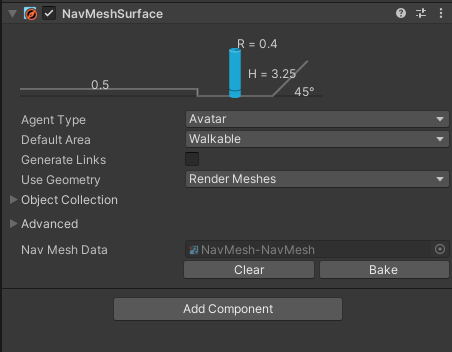
Nav Mesh Surface (Important)
This component is essential for generating the NavMesh in your game:
- Add to a GameObject: Attach the Nav Mesh Surface component.
- Configure and Bake: Adjust the settings to fit your game layout and click Bake to generate the NavMesh.
By default, the basic template includes a Nav Mesh Surface component. If it's not present, add it to the scene.
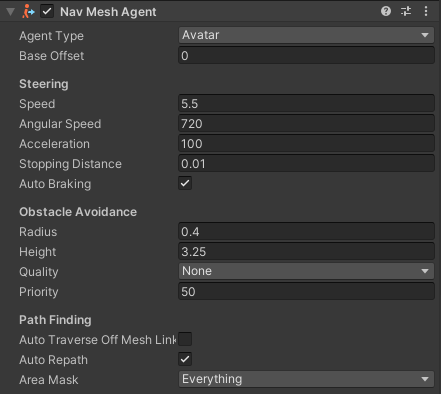
Nav Mesh Agent
This component allows characters to follow the NavMesh paths:
- Attach to Characters: Apply Nav Mesh Agent to any game object that needs to navigate the scene.
- Customize Movement: Adjust properties like speed and pathfinding behavior to fine-tune navigation.
By default, characters (avatar) have a Nav Mesh Agent component attached.
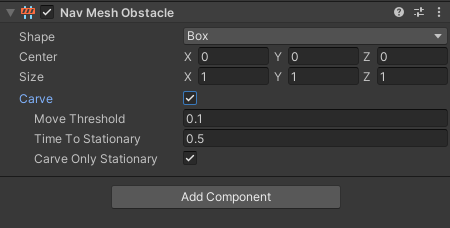
Nav Mesh Obstacle
Defines non-walkable regions within the game environment:
- Create Obstacles: Apply this to objects that should block character movement.
- Adjust Properties: Set the size and shape to control how characters navigate around them.
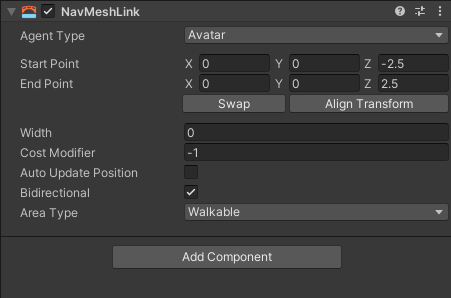
Nav Mesh Link
Connects separate areas of the NavMesh for advanced pathfinding:
- Link Different Areas: Useful for creating shortcuts or alternative routes.
- Properties Adjustment: Modify connection settings to allow for customized navigation solutions.
We will cover more about this in the next lectures (Jump Points).
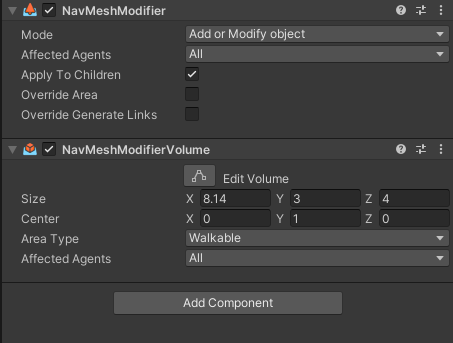
Nav Mesh Modifier & Nav Mesh Modifier Volume
Modify how the NavMesh is applied in specific areas or volumes:
- Local Adjustments: Apply these components to fine-tune the NavMesh in particular sections of the game world.
- Set Exclusions or Inclusions: Determine areas that the NavMesh should ignore or specifically cover.
Baking the NavMesh
To finalize the NavMesh in your scene:
- Configure the Nav Mesh Surface with the correct settings for your scene.
- Click Bake: This process generates the walkable areas as defined by your settings.
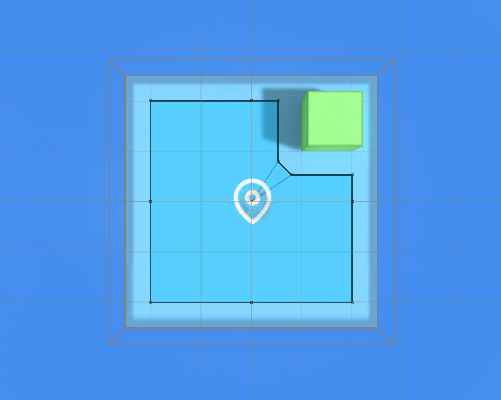
The highlighted blue areas represent the walkable paths for characters to navigate through the scene.
Managing Your NavMesh
Changes in the scene layout require a re-bake of the NavMesh to ensure accurate navigation. Always rebake the NavMesh when adding or moving objects that affect navigation paths.
YouTube Tutorial
Conclusion
We've covered how to create and manage a Navigation Mesh in Highrise Studio, which is essential for enabling characters to move intelligently in your game environments. Each component plays a crucial role in defining and refining the navigation capabilities of your game characters.
Next Steps
Experiment with different NavMesh components and settings to create diverse navigation paths for characters in your game. In the next lecture, we'll explore Jump Points to enhance character movement and pathfinding.

