Lecture 3: Creating Your First Project
Introduction
In this lecture, we will guide you through the process of creating your first project in Highrise Studio.
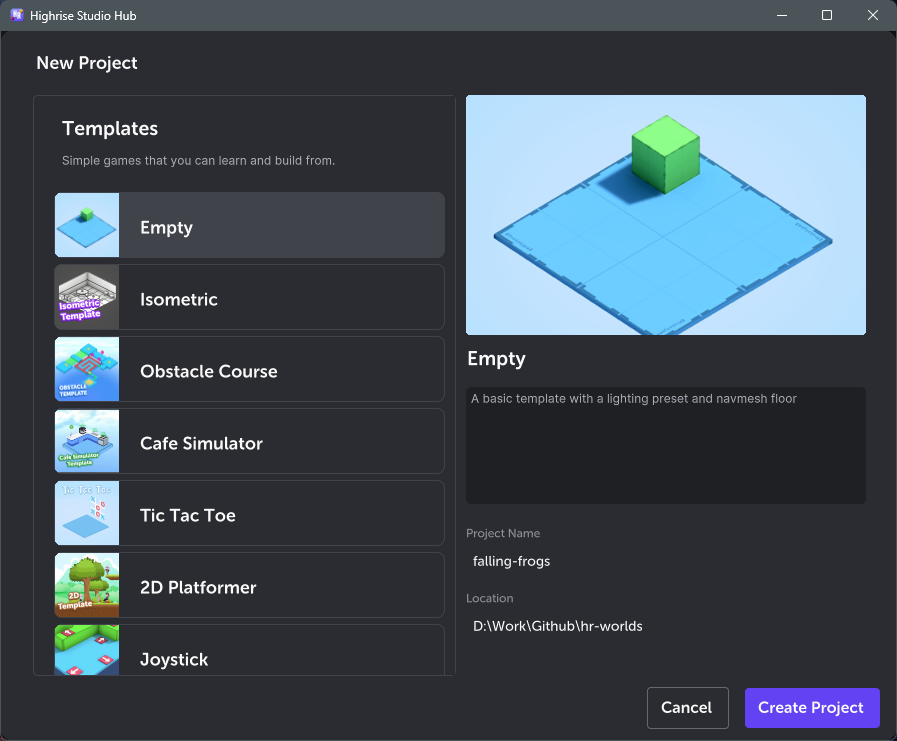
Creating a New Project
- Open Highrise Studio Hub.
- Click on the "New Project" button.
- Select a template for your project (Go with the empty template for now).
- Name your project and choose a location to save it.
- Click on the "Create Project" button to create your project.
- Wait for the project to load in Unity (this may take a few minutes).
We highly suggest uploading your project to GitHub. This will help you keep track of your changes and collaborate with other developers (Advanced users only)
After Creating Your Project
Once your project is created. Unity will open and you will see the following window:
- Welcome: A brief introduction to Highrise Studio and its features.
- Tutorials: A list of tutorials to help you get started with Highrise Studio.
You may skip the tutorial for this lecture. We will cover the basics of Highrise Studio in the next lecture.
Unity Layout
Unity has a customizable layout that allows you to arrange the different panels and windows to suit your workflow. The default layout includes the following panels:
- Scene & Game View (Highlighted green)
- Project & Console (Highlighted Pink)
- Hierarchy (Highlighted Blue)
- Inspector (Highlighted Orange)
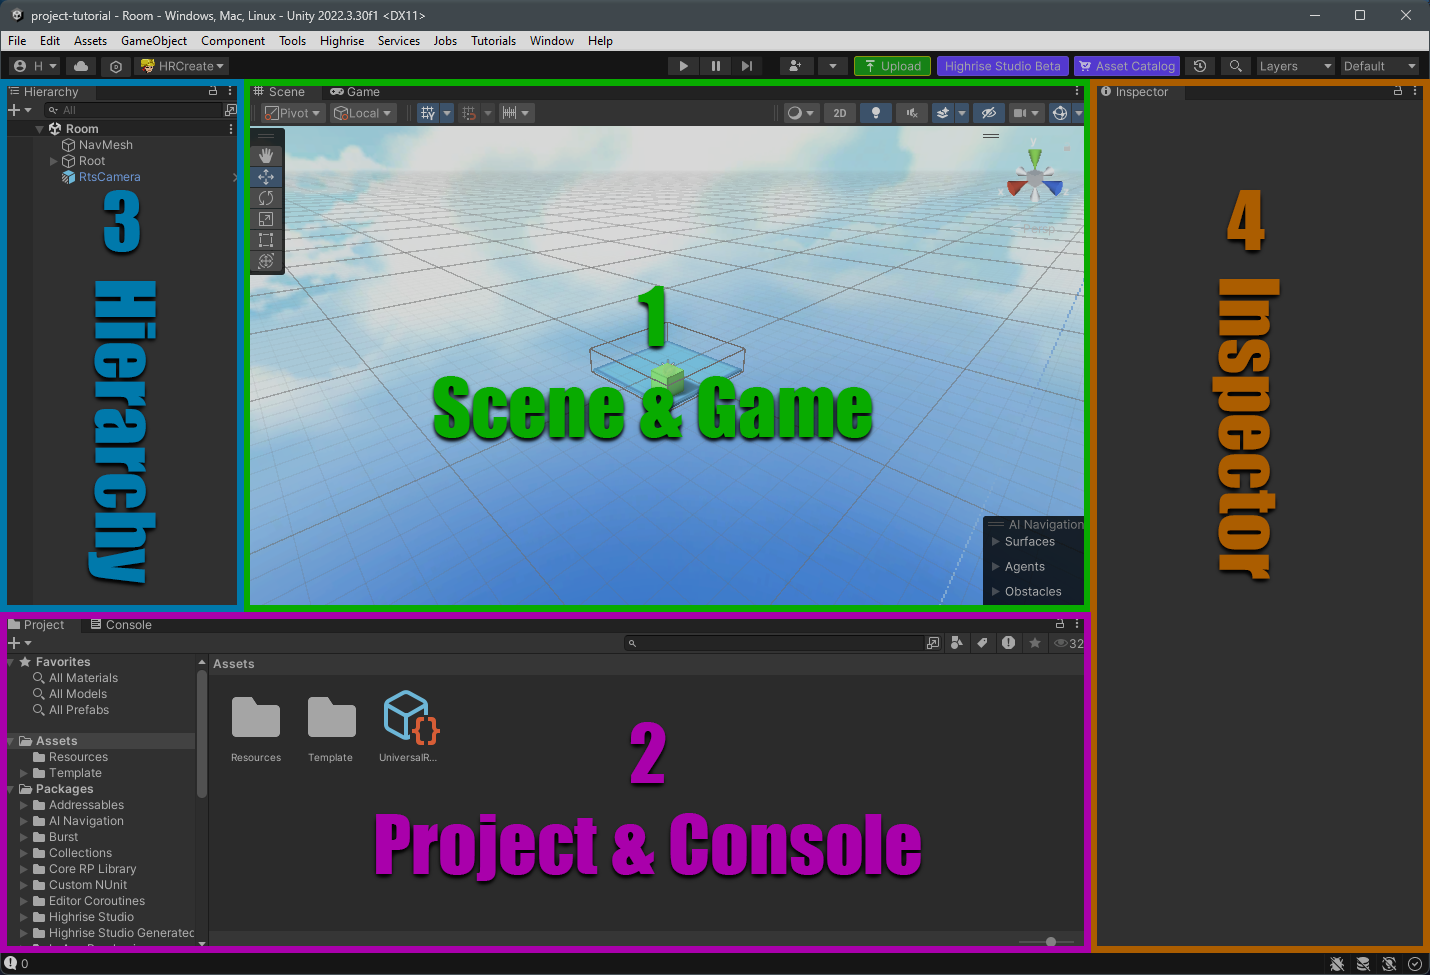
You can hold any panel and drag it to a different location to rearrange the layout.
If you lose a panel, you can reset the layout by going to Window > Layouts > Default. Or by finding the panel in the Window menu.
Scene & Game View
The Scene view is where you will build your game world. You can add and manipulate objects in the scene, such as terrain, buildings, and characters. The Game view is where you can see what your game will look like when it is played or you can use the Play button to test it in the editor.
-
Suggested Shortcuts:
F- Focus on the selected objectQ- Move toolW- Rotate toolE- Scale toolR- Rect tool2- Switch between 2D and 3D viewCTRL + 1 or CTRL + 2- Switch between Scene and Game view
-
Navigation Shortcuts:
Right Mouse Button- Rotate the viewMiddle Mouse Button- Pan the viewMouse Wheel- Zoom in and out
-
Movement Shortcuts:
Right Click + W- Move forwardRight Click + S- Move backwardRight Click + A- Move leftRight Click + D- Move rightRight Click + Q- Move upRight Click + E- Move down
In Game View, you can select 'Game,' change it to 'Simulation,' and then choose the device model to see how your game will look on different devices.
If you are familiar with Unity, you can skip this section. If not, we highly suggest you to check out the Unity Learn website for more information.
Project & Console
The Project view is where you can see all the assets in your project, such as models, textures, and scripts. You can also create new folders and organize your assets in the Project view. The Console view is where you can see any errors or warnings that occur in your project.
The Project also contains Packages. Packages are collections of assets and scripts that can be imported into your project. Highrise Studio uses packages to provide the necessary tools and assets for Highrise development.
- Example Structure: ├── Assets │ ├── Scripts # Project scripts │ ├── Prefabs # Project prefabs │ ├── Textures # Project textures │ ├── Materials # Project materials │ ├── Models # Project models │ └── Animations # Project animations ├── Packages # Packages
Here's a revised version of your text with improved clarity and conciseness:
The Console view displays errors and warnings that occur in your project. You can also use it to log messages and debug your code. Don't panic if you see errors or warnings; some are normal and can be ignored. If you encounter errors or warnings that are unclear, consider searching online or seeking assistance on the Highrise Discord server.
Pro Tip: The 'Error Pause' feature may make the game view appear frozen, but the game is still running; only the editor is paused. You can disable this feature by clicking on 'Error Pause' in the Console view."
Hierarchy
The Hierarchy view displays all the objects in your scene. You can select and manipulate objects in the Hierarchy view. You can also create new objects and organize them in the Hierarchy view.
- Hierarchy Shortcuts:
CTRL + D- Duplicate the selected objectDelete- Delete the selected objectCTRL + Z- Undo the last actionCTRL + Y- Redo the last actionRight Click + F- Focus on the selected object
Each scene has its own Hierarchy. If you have multiple scenes, make sure you are in the correct scene before making changes. The scene name can be located at the top of the Hierarchy view.
Inspector
The Inspector view displays the properties of the selected object. You can use the Inspector view to change the position, rotation, and scale of objects. You can also add components to objects and change their properties in the Inspector view.
Components are the building blocks of Unity. They are used to add functionality to objects in your scene. For example, you can add a Rigidbody component to an object to make it affected by physics, or you can add a Collider component to an object to make it interact with other objects.
We will dig deeper into Components and GameObjects in the next lectures.
Other Important Buttons & Tabs
- Play Button: Located at the top of the Unity editor, this button lets you play and test your game directly in the editor.
- Sign In Button: Found at the top left corner of the Unity editor, this button allows you to sign into your Highrise account and publish your game.
- Asset Catalog Button: Situated at the top right corner of the Unity editor, this button gives you access to the Highrise Asset Catalog to find and import game assets.
- Virtual Player Button: Next to the Play button and marked with a person icon, this button enables game testing with a virtual player, bypassing the need to play directly in the editor.
Example Layout (Personal Preference)
When it comes to layout, it's all about personal preference. Follow what works best for you. Here's an example layout that I personally prefer:
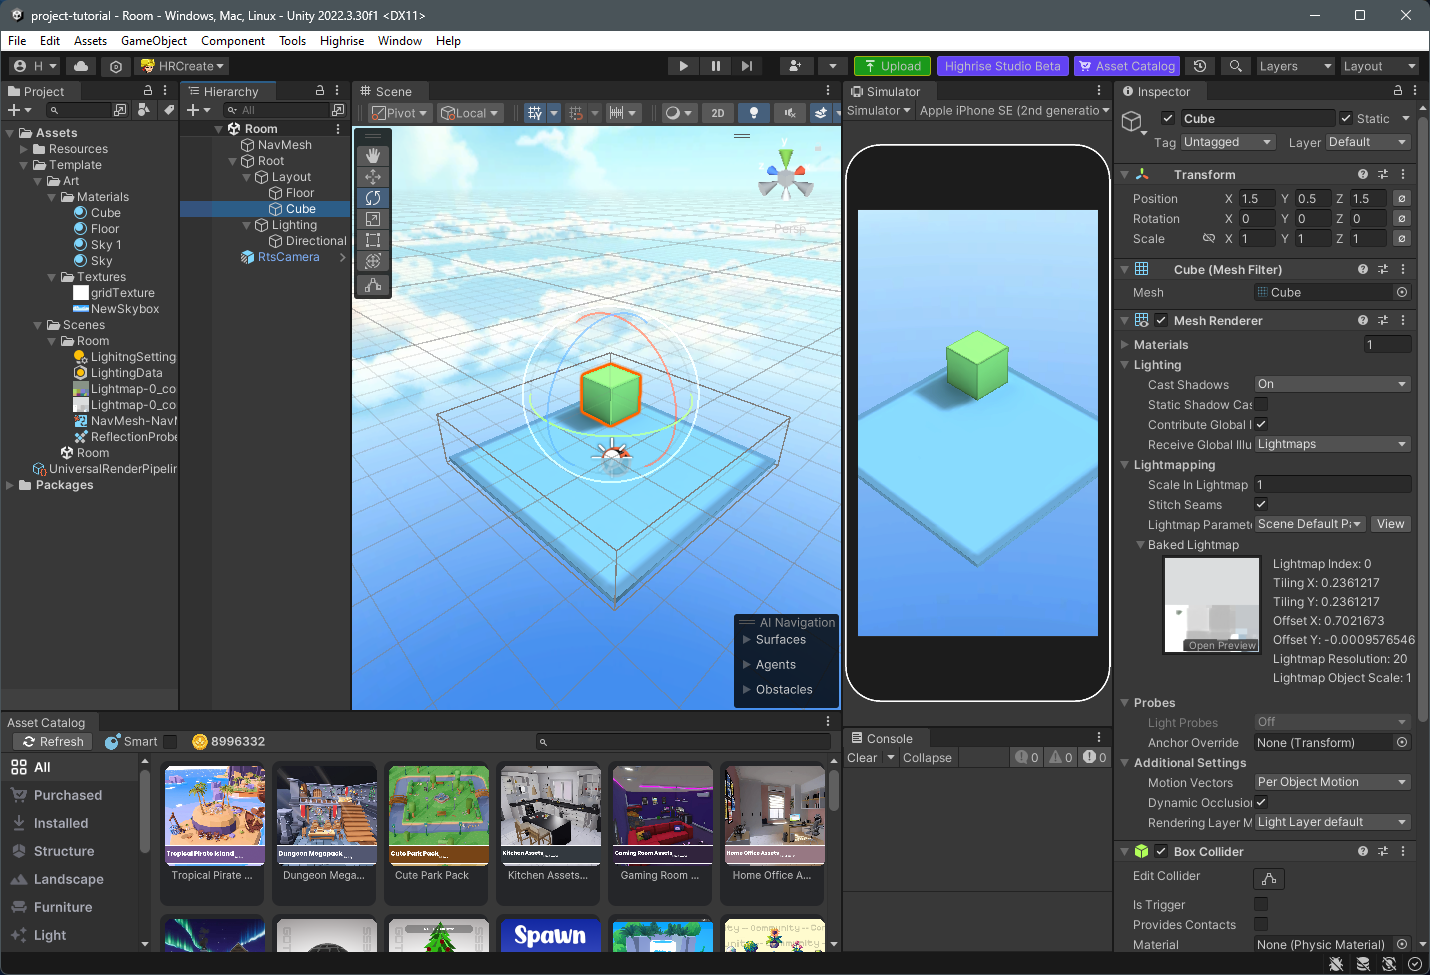
Play around with the layout and find what works best for you. You can always reset the layout by going to Window > Layouts > Default.
YouTube Tutorial
Conclusion
In this lecture, we covered the basics of Unity and how to create a new project in Highrise Studio. We also discussed the different panels and windows in Unity and their functions. In the next lecture, we will cover the basics of Highrise Studio and how to use it to create your first game.

