Replit Setup and Hosting
This tutorial will guide you through the process of setting up the Replit development environment for Highrise bots. It will take you step-by-step, from creating your first Repl, installing the Highrise Python SDK and its dependencies, to deploying your first Highrise bot. Furthermore, it will demonstrate how to leverage Replit's Always On feature, ensuring that your bot remains active 24/7.
We encourage you to follow along with the video tutorial to ensure a successful setup and understanding of how to maintain a constant bot presence in Highrise. Your journey into Highrise bot development and hosting starts here.
Step 1: Setting Up Replit Account
- Create an account on Replit, an online coding platform that allows us to write, run, and host our bot's code directly in a browser.
- After logging in, you'll be taken to your home page. From here, click the
+button in the top left to create a new "repl", which is a programming environment for a specific project.
Step 2: Creating Your Python Environment
- Select the Python template and name your repl (this name won't affect anything in-game, it's just for your reference on Replit).
- Once you've created a repl, you'll be taken to the coding environment. On the left side, you'll see a file explorer, in the middle, a code editor, and on the right, a terminal where you'll input commands to run your bot.
Step 3: Adding the Highrise Python SDK
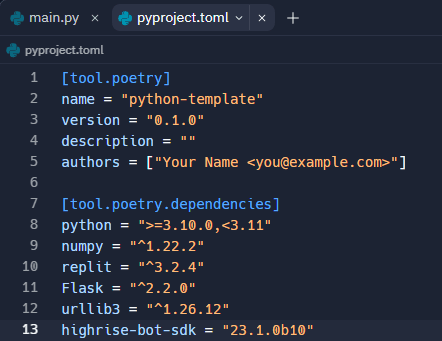
- Add the Highrise Python SDK dependency to your project. To do this, open the
pyproject.tomlfile and add the latest version of the SDK. As of now, it'shighrise-bot-sdk = "24.1.0".

- Update the dependencies by going to the shell tab on the right and executing the command
poetry update. This command updates all of the dependencies to their latest versions according to the restrictions specified in thepyproject.tomlconfiguration file. It's important to perform this step; otherwise, our code won't work.
Step 4: Adding Your Bot Code
- In the
main.pyfile, add your bot code. For this tutorial, copy the Echo bot from the Highrise Create Portal. - Ensure you have two important pieces of information: your bot's API token and the Room ID. The room should be one where you have owner or designer privileges.
Step 5: Running Your Bot
-
In the shell tab, execute the following command, replacing
<bot_class>,<room_id>, and<api_token>with your actual bot class name, Room ID, and API token respectively:highrise main:<bot_class> <room_id> <api_token> -
If "start" is printed to the screen, your bot has successfully connected to the server, and the basic setup is complete.
Step 6: Configuring the "Run" Button
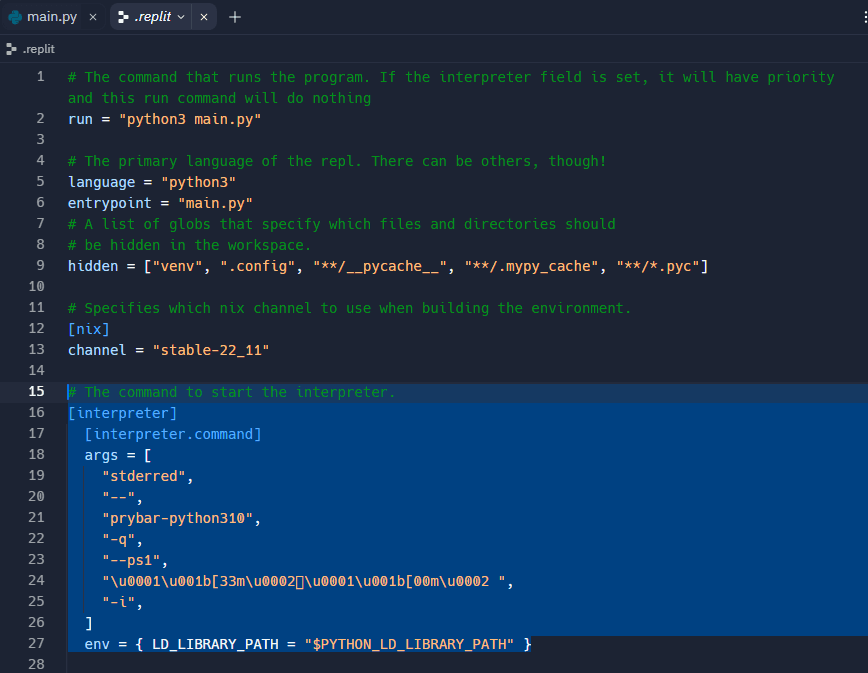
- To make the big "Run" button functional, edit the hidden
.replitfile. - Click on the three dots at the top right of the file explorer, and select
Show Hidden Files. You can find the.replitfile there. - Delete the entire code block under the
interpreterblock (lines 15 to 27).

- Replace the
runcommand with the same command that runs your bot. For example, replacepython3 main.pywith the appropriate Highrise command as described in Step 5.

Step 7: Hosting Your Bot 24/7
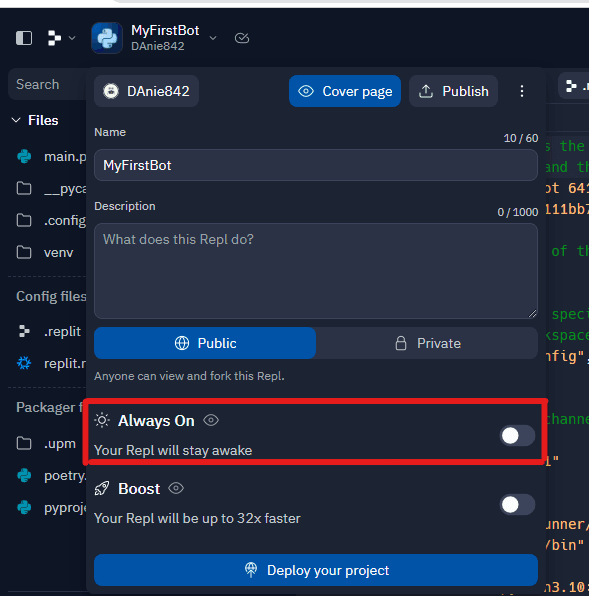
- To keep your bot active even after closing your Replit tab or shutting down your computer, use Replit's
Always Onfeature.

- This feature is accessible with a monthly subscription starting at $7/month for Replit’s hacker plan. Alternatively, it costs 20 cycles per day, where a cycle is Replit's form of virtual currency.
- Choose your preferred method of purchasing this feature, activate the
Always Onpower up, and your bot will stay up and running 24/7, allowing it to interact with Highrise at all times.
Note: Please ensure the code running 24/7 does not violate any Highrise terms of service or create an unfriendly environment for other players. As responsible developers, it's our duty to ensure a fair and enjoyable experience for everyone.
For any questions or issues, feel free to join the Highrise Discord community.
Updated over 1 year ago